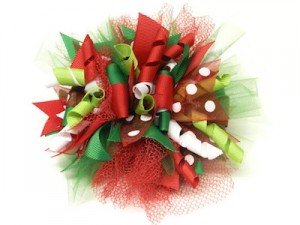
We are always finding new and exciting ways to create hair bows with our Mini Bowdabra and Hair Bow Tool & Ruler 
To make your hair bow first begin with an assorted ribbon combination we used different width grosgrain and a polka dot sheer. Cut the ribbon 21? long and dovetail the ends. The hair bow is being made on a 2.75? French Hair Clip.
Before working with the French Hair Clip take the spring center piece out of the clip and set it aside. Next, cut a piece of 24? Bowdabra Bow Wire. Then using the Bowdabra Bow Wire tie the stacked ribbon ends onto the clip. Then create four loops that are attached and tied to the hair clip. To create the loops form a crease at the 4? mark using our “Mountain Down” technique (referencing the Hair Bow Tool & Ruler Interactive CD). Then loop the Bowdabra Bow Wire around the clip and ribbon and then back through and pull tightly. Continue creases every 4? and form four loops, tie the ribbon dovetailed ends on the other side and trim away wire.
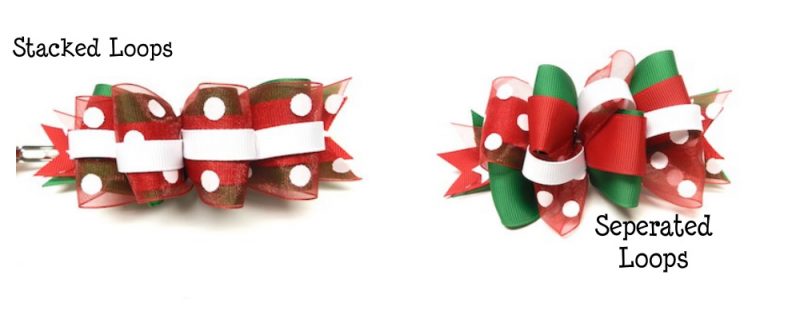
Once the four loops are formed you are left with a stacked loops. Separate the stacked loops for a full bow look.

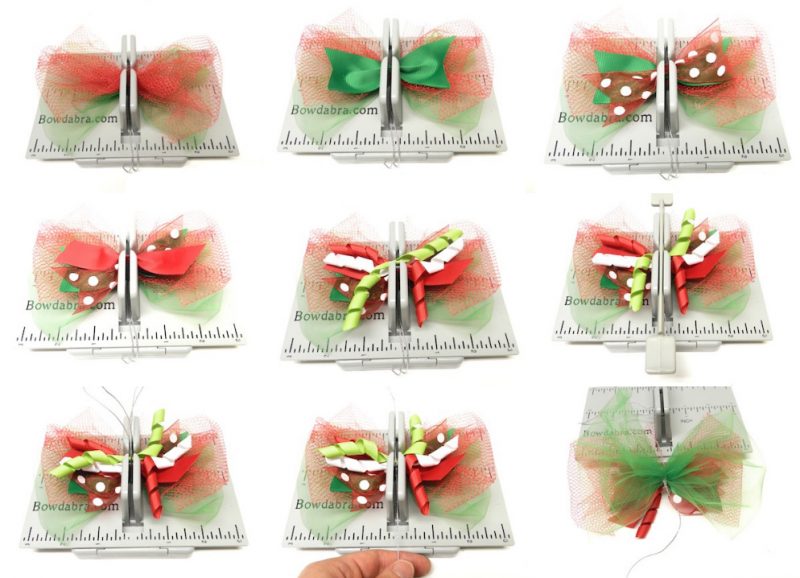
Then using the Mini Bowdabra and Hair Bow Tool & Ruler create the bows that will fit between each loop. To make your first bow add green tulle and red netting creating two loops of each at the 2? mark. Add ribbon sprays and korker ribbon (learn how to make korker ribbon). Finish by scrunching down the ribbon with the Mini Bowdabra Wand. While the bow is still in the Mini Bowdabra, thread the two loose ends of the Mini Bowdabra Bow Wire through the loop at the other end. Pull the Bowdabra Bow Wire tightly while the bow is still in the Mini Bowdabra. Gently pull the bow out of the Mini Bowdabra. Separate the two loose ends of the Bowdabra Bow Wire and bring them around to the back of the bow and knot. Optional Extra Step: Once bow is complete trim the tulle and netting so that it is not in loops.

Follow the above instructions to make a total of three bows. Next, tie the bows on top of the Bowdabra Bow Wire that separates your loops on the French Hair Clip. Tie the bows tightly to the French Clip and then twist the Bowdabra Bow Wire and bow one full turn. The bows should be placed up and down along the French Clip (NOT horizontal, this will give your bow a nice full look).
Place the little spring clip onto the bottom of the French Clip and your funky loopy hair bow is complete! Following these instructions and using our Mini Bowdabra and Hair Bow Tool & Ruler you can make identical bows every time!
The Hair Bow Tool and Ruler easily fits over the Mini Bowdabra. Bowdabra Ribbons Crafts & Things Store sells the items individually or you can purchase the Hair Bow Creator Pack which comes with the Mini Bowdabra, Hair Bow Tool, & Ribbon.
