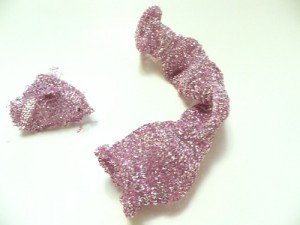
I must admit I had an awesome time creating this “blinged” headband. The headband is created using two colorful scouring pads that I found at the Dollar Store!

Materials and tools you will need for this craft:
- Plastic Colorful Scouring Pads
- Large Width Headband
- Embroidery Thread
- Embroidery Needle
- Mini Bowdabra
- Hair Bow Tool & Ruler
- Scrap Ribbon
- Glue Gun
- Scissors
Instructions:
1. To being cut the very top inner circle of the scouring pad to open it up. Next, unroll the insides you are left with a large sleeve. Trim away the circle and keep the long sleeve intact.

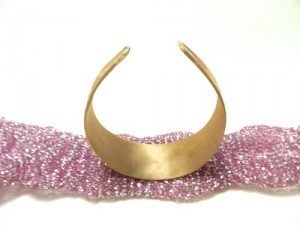
2. Next, flatten out the mesh sleeve. Place a large width headband in the center (I used one I found at the Dollar Store.)

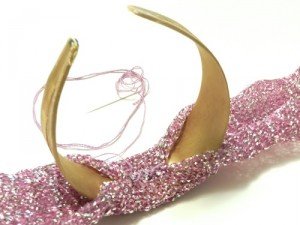
3. Using embroidery thread sew the sides of the sleeve together tightly with the headband inside. Start sewing at the center.

4. When you reach the thinner ends of the headband pull the mesh tighter and overlap each end. Continue sewing all the way to bottom of the headband.
5. Start in the center and sew the plastic mesh together on the other side. Then trim the mesh at the bottom of the headband and add some dabs of hot glue.
6. Fold some ribbon over the ends and hot glue it in place.
7. Wrap ribbon completely around the ends and hot glue it in place for a nice finished look.
8. Use the Mini Bowdabra and Hair Bow Tool & Ruler to create a fun bow. I made a 4? Boutique Bow, added some scrap ribbon strands, and scraps of plastic mesh from the other colored scour for the center of the bow
9. Finish the bow by scrunching down the bow with the Mini Bowdabra Wand. While the bow is still in the Mini Bowdabra, thread the two loose ends of the Mini Bowdabra Bow Wire through the loop at the other end. Pull the Bowdabra Bow Wire tightly while the bow is still in the Mini Bowdabra. Gently pull the bow out of the Mini Bowdabra. Separate the two loose ends of the Bowdabra Bow Wire and bring them around to the back of the bow and knot. Fluff bow.
10. Next, I trimmed away the extra Bowdabra Bow Wire and used embroidery thread and needle to attach the bow to the plastic mesh headband.
11. Add a few extra dabs of glue to the back of the bow and your headband is ready to be worn.
12. I love my “headband for less” I have a shirt that it matches perfectly with! And I am pretty sure that no one would ever guess the material I used to make this headband!