Ribbon comes in so many fun and unique colors and patterns! I love to create, design, and personalize craft projects 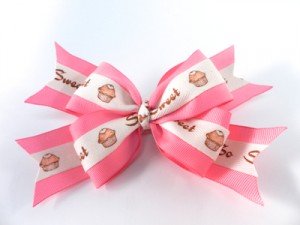
Ever look at two ribbons love the designs and wish you could combine them into one?
Actually you can!
I adore the Morex Bobbin Twill Ribbon there are so many cute designs and sayings! You can use the twill bobbin ribbon as a stand alone or you can attach it to grosgrain ribbon for your own custom personalized ribbon. To attach one ribbon to another I have started to use Dritz Stitch Witchery Fusible Bonding Web. There are other items similar to this product but I have had the best luck with this one. What I like best about this fusible bonding product is that you can use steam to bond the ribbon together. Many of the other products on the market require a dry iron and they just do not hold up as well, in my opinion. In the past I have also used fabric glue. However, I have noticed that the glue can get bumpy and leave staining on the back of some ribbons. After much trial and error currently my fave is Stitch Witchery.
To adhere one ribbon to another cut two ribbons the same length.
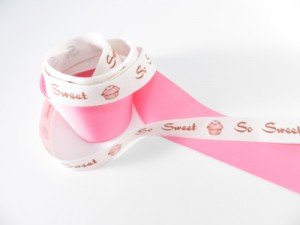
Next, cut a piece of Stitch Witchery the same length and width of the ribbon you are bonding. Iron the two ribbons together with the Stitch Witchery in the middle.
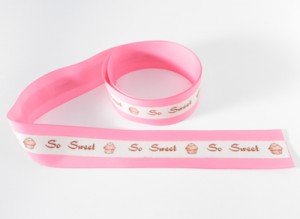
Once you have created your own custom ribbon use it to design a hair clip, belt, pin, etc.
We used our custom ribbon to make a hair bow. To make this hair bow you will need:
- Mini Bowdabra
- Bowdabra Bow Wire
- Hair Bow Tool and Ruler
- So Sweet Twill Ribbon
- 1.5? Grosgrain Ribbon Colonial Rose
Instructions:
1. Begin by gathering your materials. You will need a Mini Bowdabra, Bowdabra Hair Bow Tool and Ruler, and Bowdabra Bow Wire. Place the Bowdabra ® Hair Bow Tool and Ruler onto the Mini Bowdabra, leaving a space at the bottom for the Mini Bowdabra tower to move. Cut an 18” piece of Bowdabra Bow Wire and fold it in half. Lay it into the Mini Bowdabra. You’ll have a loop at one end and two loose pieces at the opposite end. Cut two strands of 6? long ribbon dovetailed at the ends place them into the Mini Bowdabra.
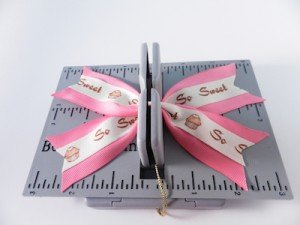
2. Next, cut the ribbon according to the ribbon length chart in the Interactive CD to make a 4? wide Boutique Bow. (The Hair Bow Tool & Ruler comes with an Interactive CD to make 70 different hair bows along with detailed instructions including ribbon length.)
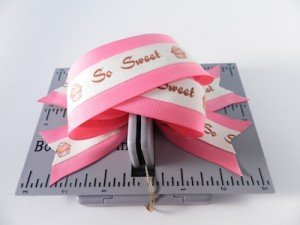
3. Using the Hair Bow Tool & Ruler as your guide create the Boutique Bow.
4. Scrunch down the ribbon with the Bowdabra Wand. While the bow is still in the Mini Bowdabra, thread the two loose ends of the Mini Bowdabra Bow Wire through the loop at the other end. Pull the Bowdabra Bow Wire tightly while the bow is still in the Mini Bowdabra.
5. Gently pull the bow out of the Mini Bowdabra. Separate the two loose ends of the Bowdabra Bow Wire and bring them around to the back of the bow and knot.
6. Use the Bowdabra Bow Wire to attach a hair clip. We used a single prong alligator clip. Trim away excess wire. Cut a piece of twill ribbon and knot it in the center for your finishing piece.
7. Glue your finishing knot over the Bowdabra Bow Wire and your bow is complete.
The Hair Bow Tool and Ruler easily fits over the Mini Bowdabra. Bowdabra Ribbons Crafts & Things Store sells the items individually or you can purchase the Hair Bow Creator Pack which comes with the Mini Bowdabra, Hair Bow Tool, & Ribbon.